

A pest nest identification AI agent from a failed bee vacuum
October 5, 2026
Navigation Bar
Apply Theme
- Introduction
- Keywords
- Brands
- Hardware
- Software
- Description
- Designing and printing the cleaner-compatible bee vacuum
- Assembling the cleaner-compatible bee vacuum
- Failed yellowjacket nest removal attempt with the custom bee vacuum
- Developing the pest reporting AI agent on the Dragonwing IQ-9075 EVK
- Outcome: Employing the AI agent to analyze nest activity from videos and obtain a PDF report about potential pest species
- Project GitHub Repository
- Schematics
- Code
- Custom assets
- See on other platforms
- Related projects
Inspired to develop this local AI agent after failing to remove a yellowjacket nest with my custom bee vacuum due to my lack of knowledge :)
Keywords
Hardware
- 1Dragonwing IQ-9075 EVK
- 1Bambu Lab A1 Combo
- 1M2 Screws, Nuts, and Washers
- 1Samsung VC07T35 Cylinder Vacuum Cleaner
Description
If you are familiar with my project tutorials, you may know that I enjoy developing multidisciplinary proof-of-concept research projects that focus on solving real-world problems. Usually, it takes a long time for me to complete a project since I prefer designing custom mechanical parts, PCBs, and firmware from the ground up to be able to control all experiment parameters. Nonetheless, this project was an impromptu idea born out of a failed solution while I was trying to get rid of a pest infestation on my balcony. In this project, I wanted to showcase how a lack of knowledge and experience may lead to a painful and costly mistake, and how employing AI-oriented assistance can help prevent mistakes by providing educated guesses on potential culprits and emphasizing contacting experts for nest removal.
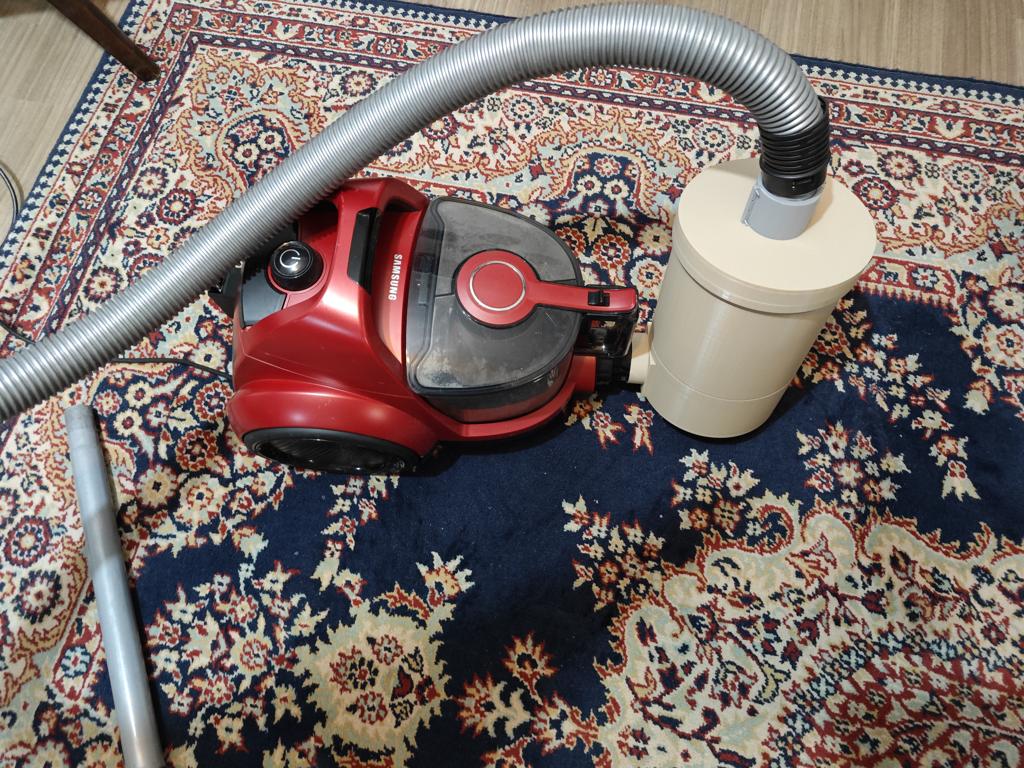
Nearly two months ago, I noticed bee-like pest activity near a small opening outside the wall insulation in my balcony. After some superficial research on species that prefer wall insulation and seeing a bumblebee flying over the flowers on my balcony, I falsely deduced that the pest nest belonged to a bumblebee colony. Thus, I did not give much credence to the increasing colony size and decided to design a custom 3D-printable bee trap, inspired by honey bee vacuums, to safely relocate the nest. As I thought I could create an easily replicable device to help people facing a similar problem, I decided to design my bee trap as an add-on accessory to my Samsung cylinder vacuum cleaner. In this regard, I gradually worked on my bee vacuum and designed it to be attachable between the cleaner hose and the hose connection adapter. I heavily focused on the device's modularity and redirecting the negative pressure and airflow (suction) to safely collect bees.
However, I have made a huge mistake by focusing on the results and ignoring my lack of knowledge about pest species. I realized my mistake as I was searching for bumblebees' airflow resistance to design a safe bee vacuum inner frame. Thanks to a random but lucky article inspection, I came to the conclusion that the flight patterns of the species residing in my balcony do not correspond to those of bees but rather to those of wasps. Considering the wall insulation nest, they were more likely yellowjackets. Once I went out to investigate the nest up close to confirm my new assumption, I could not even get near it; the colony had become too aggressive. The only thing I could do was to squeeze a plastic bag near the opening via a broom to protect myself. Since I utilized this balcony area as storage and only inspected the nest behind a window, I did not notice this aggressiveness and threat.
After realizing this was a pest infestation, I decided to speed up developing my bee vacuum and remove the nest immediately. I even purchased a beekeeping hoodie :) Unfortunately, again due to my lack of knowledge and experience, I made colossally wrong assumptions about the nest population and size. Once I tried to remove the pest nest with my bee vacuum, hundreds of yellowjackets swarmed and stung me three times. Thankfully, I was wearing the hoodie and did not show any allergic symptoms. Thus, my experiment did not cause any serious health issues; the only positive result I got from this experiment was a funny video documenting how yellowjackets successfully repelled me :)
At this point, this infestation stopped being an experiment on a custom bee vacuum and became a dangerous threat to me and my neighbours. Thus, I immediately contacted a professional firm to eliminate the yellowjacket infestation. They applied chemical treatment and needed to break the wall insulation to remove the whole nest. Little did I know, the insulation company left a huge void between the panels, throwing all of my nest size estimations out of the window.
After this painful yet enlightening experience, I still wanted to publish my 3D-printable bee vacuum since it can work perfectly for more docile species such as bumblebees, in the case that the user has the appropriate protection gear and attire. Nevertheless, I also wanted to examine and share how I could employ AI to develop a simple solution to safely investigate potential pest species and their threat levels, leading the user to take action early and contact experts with scrutinizing articles not by chance but by contrivance. After mulling over different AI-oriented solutions, I decided to develop a VLM-enabled AI agent and assign a simple web interface to the agent for user interactions.
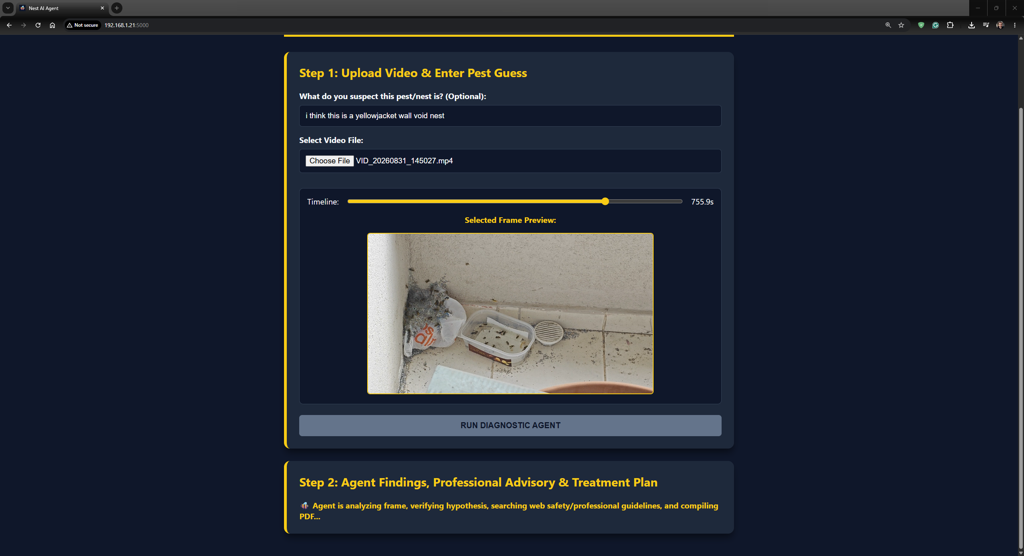
The web interface allows the user to upload videos of outside nest activity, select frames from the video, and pass the selected frame to the AI agent. The web interface also lets the user enter assumptions about pest species based on the monitored nest activity. Then, the AI agent utilizes a vision-language model to analyze the nest activity and deduce the pest species shown in the provided frame. After getting the VLM inference result, the agent searches the internet to collect information about the VLM-detected pest species and nest type. If the user provided assumptions, the agent also reviews the viability of these deductions based on its web-scraped research. Finally, the agent generates a PDF report file based on the web-extracted information, including potential pest culprits, species threat levels, colony behaviour, and the importance of contacting experts according to the predicted species.
Since I did not want to develop a complex AI agent pipeline, requiring paid subscriptions or high-end components, I decided to utilize the Dragonwing IQ-9075 EVK to:
- run the AI agent (smolagents),
- run large language models and vision-language models locally via Ollama,
- host the web interface via the Flask lightweight web framework.
After testing the AI agent and asking about my situation, it immediately suggested the infestation might be caused by paper wasps or yellowjackets. After specifying the wall insulation removal, the agent strongly suggested yellowjacket activity and the necessity of contacting professionals :) So the results clearly state that I would probably be able to solve my infestation problem in less than a week instead of enabling it to span nearly two and a half months if I were not ignorant of my inexperience and focused on developing a solution to gain more information, capitalizing on the open-source AI tools.
As discussed, I developed this AI agent to showcase how AI can provide tailored pest infestation reports, combining VLMs and LLMs, to help the user notice dangerous species and emphasize contacting experts instead of DIY solutions to prevent hazardous situations that could pose health risks. Of course, I cannot stress enough that this is a proof-of-concept project and is meant to encourage users to avoid DIY solutions in the case of dangerous pest species. If you notice colony aggressiveness or erratic pest behaviour, please do not trust any information, including but not limited to AI solutions, and directly contact experts for removal. You can develop needle-induced allergies at any time, even if you have been stung before and did not show symptoms. So, please do not be foolish like me, jumping to conclusions about developing a custom nest removal gadget, and conduct extensive research about potential risks with AI agent assistance or not 😊
Designing and printing the cleaner-compatible bee vacuum
#️⃣ First, I deliberately took measurements of the hose and the hose connection adapter of my Samsung VC07T35 cylinder vacuum cleaner. There are multiple versions of this cleaner with slightly different dust container designs; nonetheless, the bee vacuum parts should fit since all versions share the same hose and connector dimensions.
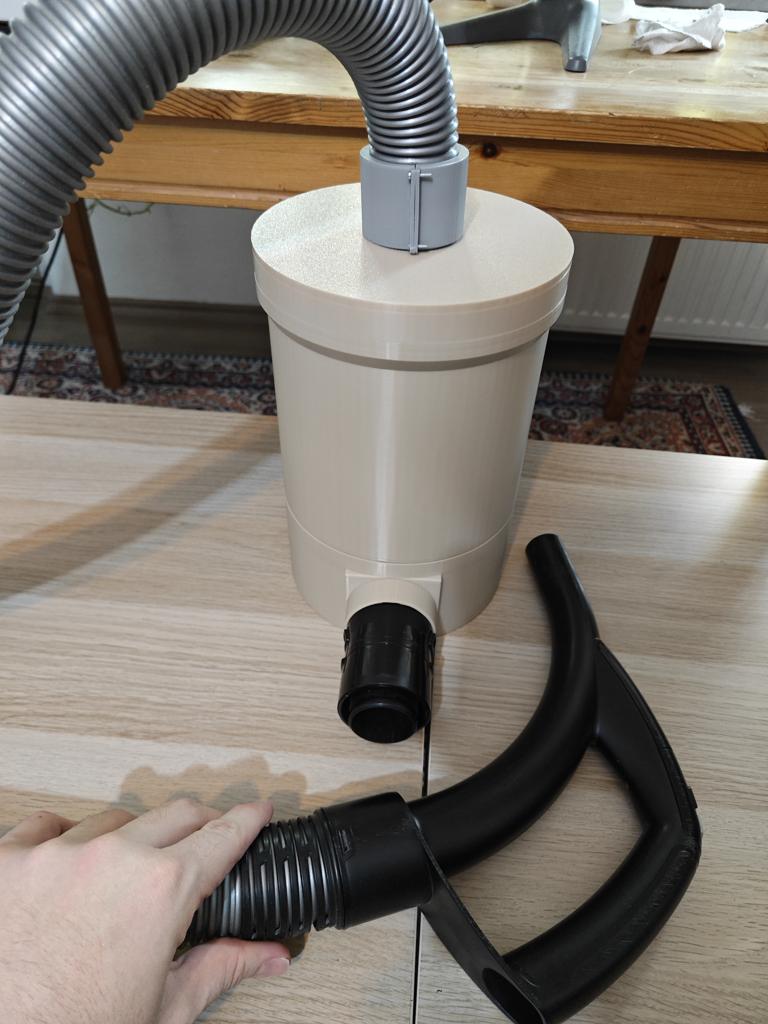
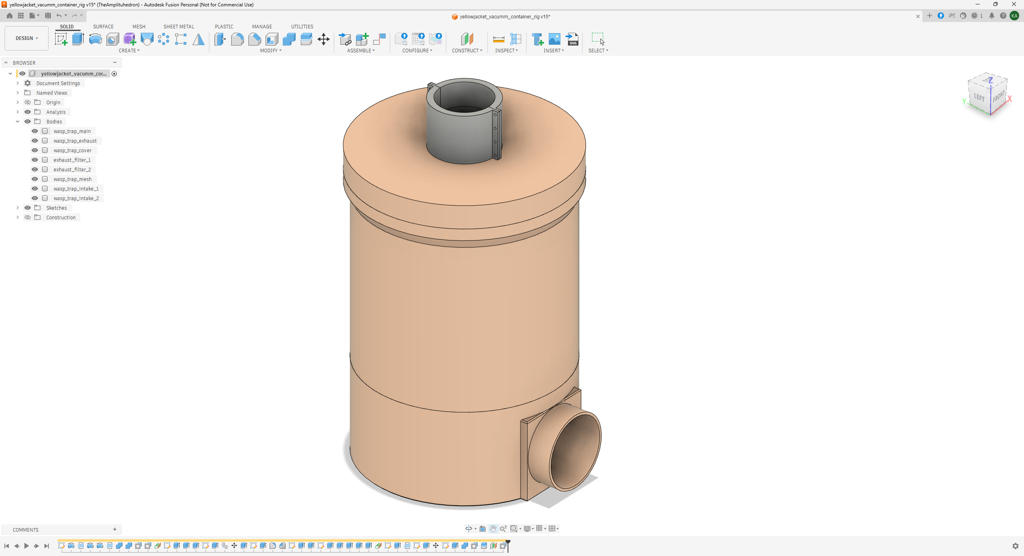
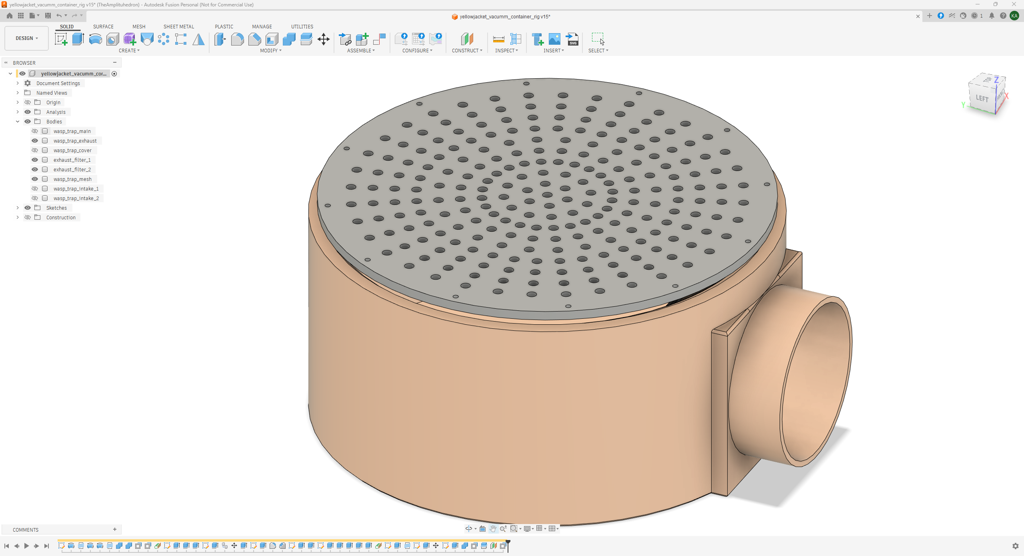
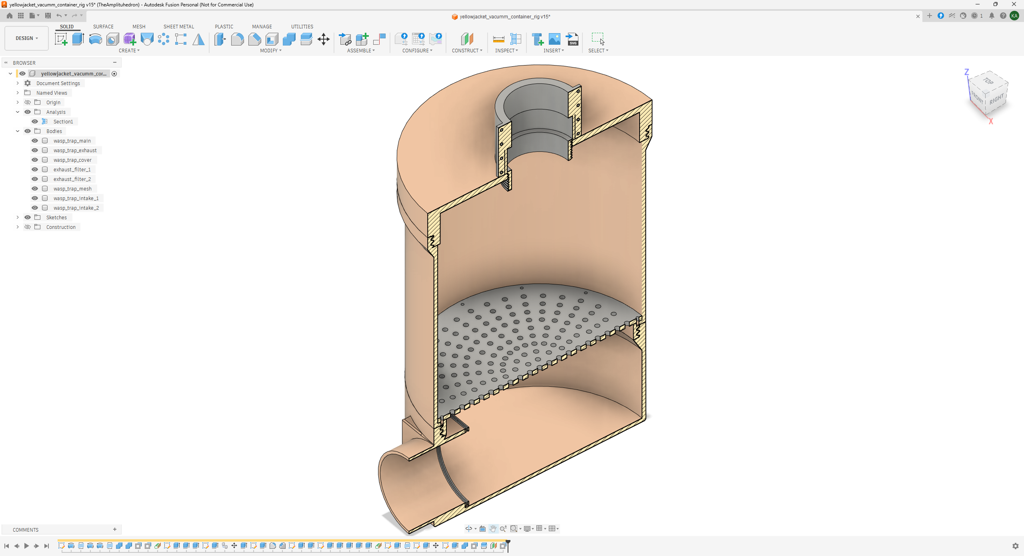
#️⃣ The main body of the bee vacumm consists of three parts: the intake cover (top), the bee trap (middle), and the exhaust container (bottom). To make the main body assembly effortless, I designed these parts with mating threaded screws.
#️⃣ To connect the cleaner hose to the intake cover, I designed a two-part case for the hose end, securing the hose via its plastic ring. The case parts can be connected via self-tapping M2 holes. Once the parts are connected, they reveal the male mating threaded screw, enabling the case to be attached to the intake cover via the corresponding female threaded screw.
#️⃣ I designed a mesh with a specific shape to disperse negative pressure (suction) as the air moves from the bee trap to the exhaust container. The mesh is attachable to the bottom of the bee trap via self-tapping M2 holes. As mentioned, I designed the mesh to soften the applied pressure since I falsely deduced that I was dealing with a bumblebee nest due to my faulty assumptions.
#️⃣ I added a friction-fit cylindrical joint to the exhaust container that connects to the hose connection adapter of the vacuum cleaner. To avoid any debris from falling into the cleaner's dust container, I designed a two-part exhaust filter frame, which works by adding a filter medium or cloth between the frame parts while attaching them to the cylindrical joint via self-tapping M2 holes.


As a frame of reference for those who aim to replicate or improve this bee vacuum gadget, I shared the STL files of all components individually as open source in the project GitHub repository.
🎨 I sliced all the exported STL files in Bambu Studio and printed them using my Bambu Lab A1 Combo. In accordance with the bee theme, I utilized these PLA filaments while printing 3D parts:
- eSun ePLA-HS Grey
- eSun PLA+ Beige
#️⃣ For all parts, I enabled tree support with critical regions only to prevent sagging on connection points.
#️⃣ Since the bee trap has a cylindrical bottom and does not have enough surface area to provide sufficient adhesion considering its height, I enabled 2-layer raft and increased the raft size (initial layer expansion) to 10 mm.
#️⃣ Other than these modifications, I utilized the default settings for all components.


Assembling the cleaner-compatible bee vacuum
#️⃣ First, I attached the mesh to the bottom of the bee trap via M2 screws. In addition to softening the negative pressure produced by the vacuum cleaner, the mesh also stops the captured pests from entering the exhaust container.
#️⃣ Since a yellowjacket worker can pass through 4 mm holes in diameter, I specifically designed the mesh to have 3.50 mm holes to trap yellowjackets safely. Yellowjackets are one of the smallest wasp species and are similar to honey bees. Thus, in theory, the bee trap should work on most bee-like pests. Of course, please conduct proper research if you want to utilize this bee vacuum on pests.


#️⃣ Then, I secured a fine cloth between the two parts of the exhaust frame and connected the frame to the cylindrical joint of the exhaust container via M2 screws.


#️⃣ I fastened the hose connection adapter of the vacuum cleaner to the exhaust container via its friction-fit cylindrical joint.


#️⃣ I attached two parts of the hose case to the cleaner's hose end, securing its plastic ring via the built-in grooves. Then, I reinforced the case connection with M2 screws, revealing the male mating threaded screw.


#️⃣ I fastened the hose case to the intake cover via the built-in mating threaded screws.


#️⃣ Then, I combined all parts of the main bee vacuum body (the intake cover, the bee trap, and the exhaust container) using the corresponding mating threaded screws.


#️⃣ Finally, I affixed the hose connection adapter to the VC07T35 cylinder vacuum cleaner.


Failed yellowjacket nest removal attempt with the custom bee vacuum
As discussed in the introduction, after completing the bee vacuum assembly, I immediately moved on to removing the yellowjacket nest. I initially planned to collect worker yellowjackets slowly and left the bee vacuum at the nest entrance for 20 - 30 minutes before applying treatment. I was going to utilize soapy water to treat the nest since I knew the wall insulation was not too thick, which was installed only on the outside of the building. Since I needed to squeeze a plastic bag due to the colony's aggressiveness in my earliest attempt to inspect the nest, and lost some time due to the inaccurate bumblebee nest assumption, I assumed the colony had become even more aggressive and purchased a beekeeping hoodie.
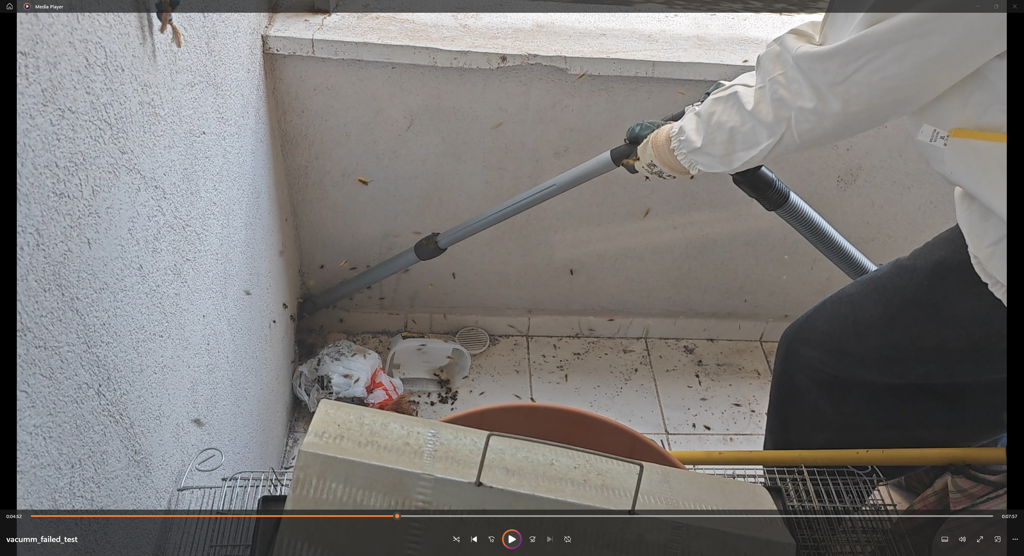
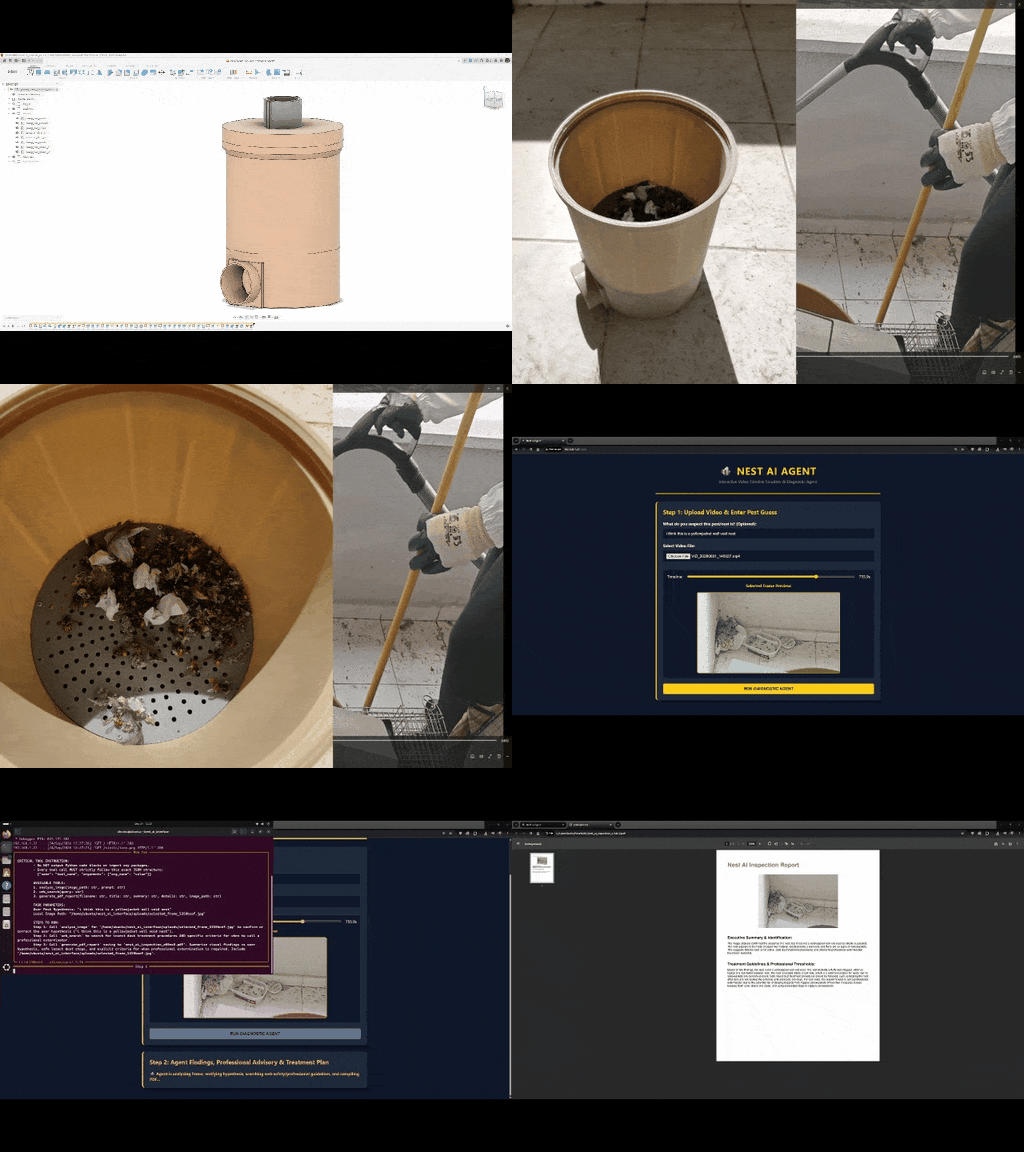
I wore the beekeeping hoodie and protective gloves before starting the removal procedure. As you can clearly see on my face, I was still skeptical and unsure of my removal decision 😀

You can inspect the whole removal process in the project demonstration video. But, as mentioned earlier, I made extremely wrong assumptions about the yellowjacket nest size and population, leading me to get swarmed by hundreds of yellowjackets and stung three times. Thankfully, I was wearing the beekeeping hoodie, and yellowjackets could only sting through the gloves, which were not rated for beekeeping.
I pointed the camera at the nest entrance to capture the removal process. Thus, the yellowjackets in the video frames are not even half of the attackers; most of them flew above the balcony ceiling.


After this failed attempt, I immediately contacted a professional firm to remove the yellowjacket nest since it had become a threat to my neighbours and me at this point. They applied chemical treatment and needed to break the wall insulation to terminate the nest.
Then, the main cause of my faulty nest size assumptions was revealed; the insulation company left a huge void between two balcony walls, in which yellowjackets were freely roaming after entering the small crack on the insulation surface near the water drainage.

After the yellowjacket nest was removed successfully, I opened the bee vacuum to check the collected yellowjackets and was surprised that the bee vacuum was able to trap more yellowjackets than I expected, considering the very limited application period :) There are white paper balls in the bee trap since I used them to test the suction power before running the bee vacuum on the nest.


Developing the pest reporting AI agent on the Dragonwing IQ-9075 EVK
As discussed, after handling the yellowjacket nest removal, I decided to develop an AI agent to showcase how an AI-oriented solution would have helped me identify pest species and correct my faulty assumptions with targeted web research.
As I wanted to enable the AI agent to analyze frames from videos displaying outside nest activity to conduct more precise web research, I needed to employ a vision-language model. Nonetheless, in accordance with the AI agent architecture, a vision-language model cannot process images directly as the agent's brain. Thus, a large language model should manage operations and run the provided vision-language model via the compatible APIs as a tool. In this regard, the large language model uses the VLM inference output to improve its input (prompt) to conduct more precise web research.
Since I wanted to assign a simple web interface to enable the user to pass frames to the AI agent and decided to run the interface on a lightweight Flask server, I created a separate virtual environment containing all AI agent operations.
#️⃣ First, I installed the required libraries to create a virtual Python environment in the root folder of the web interface.
#️⃣ Then, I activated the virtual Python environment in the root folder and installed Flask.
cd nest_ai_interface
sudo apt install python3-venv
python3 -m venv venv
source venv/bin/activate
pip install Flask


#️⃣ Then, I started to experiment with different AI agent frameworks and open-source platforms for managing large language models.
#️⃣ First, I wanted to try the Hermes AI agent since I enjoyed developing with it in my previous mini-figurine cataloger project. For the LLM framework, I decided to test the Qualcomm Docker Compose container (OpenAI-compatible), which was already installed since I used it in my latest VLM-assisted ceiling fan project.
#️⃣ I tried installing additional models from the Qualcomm AI Hub, changing model configurations, adjusting Docker container configurations, etc. However, I could not make this combination work since the AI Hub models are exported to capitalize on the IQ-9075 chip's Hexagon NPU and have context sizes of 2048 to 4096. Also, the Hermes framework's extensive tool base makes running the agent on edge devices quite taxing.
sudo apt update
sudo apt install -y git curl python3 python3-pip python3-venv

curl -fsSL https://hermes-agent.nousresearch.com/install.sh | bash

source ~/.bashrc

hermes --version

hermes model


docker-compose -f docker-compose-qcs9100-ubuntu.yaml up


#️⃣ After testing with the Hermes AI agent, I decided to change my approach and utilize a Python-based AI agent framework, which lets the user program agent tools as functions and gives more control over tool outputs to achieve deterministic results, such as identifying pest species and behaviours by analyzing frames via vision-language models. After inspecting the documentation of various frameworks, I decided to utilize smolagents provided by Hugging Face.
pip install --upgrade pip setuptools

pip install "smolagents[toolkit]"

pip install "smolagents[litellm]"


#️⃣ Again, I tried using the Qualcomm Docker Compose container at first since I had already installed multiple LLMs and VLMs from the Qualcomm AI Hub. Nonetheless, even though the smolagents framework is designed to run economically with small-context models, the context sizes of NPU-only models were still a bottleneck in creating a capable and reliable pest reporting web-enabled AI agent. Thus, I decided to abandon the Docker Compose container altogether and install the Ollama platform to run LLMs and VLMs. Although Ollama cannot run models directly on the NPU, the IQ-9075 EVK has a powerful Octa-core Kryo CPU and a capable Adreno GPU. Thus, the EVK can run models flawlessly with Ollama and handle increased context sizes easily, which are required to complete AI agent tasks.
#️⃣ First, I tried the llama3.2:3b LLM as the agent operator and the llama3.2-vision:11b VLM to analyze images.
curl -fsSL https://ollama.com/install.sh | sh

ollama pull llama3.2:3b

ollama pull llama3.2-vision:11b

#️⃣ Then, I started to develop the pest reporting AI agent's Python backend and the Flask web interface. Since this was a very simple backend and interface, managing only one function, I heavily relied on Google Gemini to program the files quickly. As I was programming the files, I tested them on the EVK simultaneously. Gemini was able to code well; I only needed to make small corrections to the files.
#️⃣ Since I wanted to enable the AI agent to generate PDF report files and utilize vision-language models as tools, I directed Gemini to create code files accordingly and installed the required packages on the EVK manually.
pip install reportlab pillow ollama

#️⃣ While testing the Python backend, I noticed that llama3.2:3b was prone to hallucinating and calling the wrong tool names. Thus, I installed qwen2.5:7b, which is a more advanced large language model and can adapt to agent tool operations easily.
#️⃣ Furthermore, I noticed that llama3.2-vision:11b requires Ollama version 0.40+ due to its architecture. Since the latest bundled Ollama version is 0.34.4 for the IQ-9075 EVK, I decided to utilize an older VLM — llava:7b.
ollama pull qwen2.5:7b

ollama pull llava:7b

📁 app.py and index.html
As mentioned, since programming the AI agent features was a mundane task, I completely programmed both code files with Google Gemini :) Thus, I did not write detailed code documentation like my previous projects; you can review both code files thoroughly on the project GitHub repository — app.py and index.html.
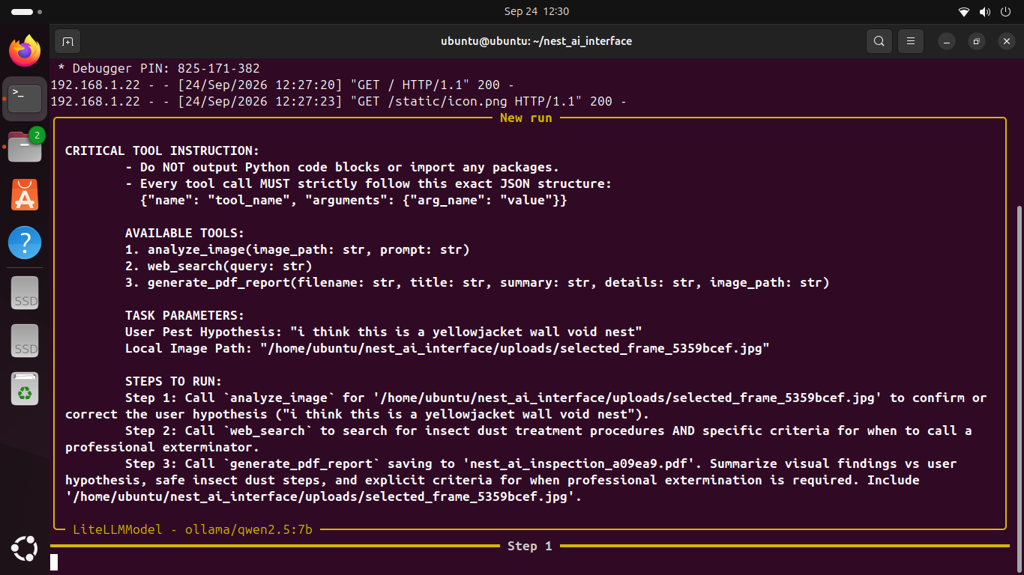
Nevertheless, I would like to share the agent's instructions to clarify its operations and tool usage.
        agent_prompt = f"""
        CRITICAL TOOL INSTRUCTION:
        - Do NOT output Python code blocks or import any packages.
        - Every tool call MUST strictly follow this exact JSON structure:
          {{"name": "tool_name", "arguments": {{"arg_name": "value"}}}}

        AVAILABLE TOOLS:
        1. analyze_image(image_path: str, prompt: str)
        2. web_search(query: str)
        3. generate_pdf_report(filename: str, title: str, summary: str, details: str, image_path: str)

        TASK PARAMETERS:
        User Pest Hypothesis: "{user_guess}"
        Local Image Path: "{image_path}"

        STEPS TO RUN:
        Step 1: Call `analyze_image` for '{image_path}' to confirm or correct the user hypothesis ("{user_guess}").
        Step 2: Call `web_search` to search for insect dust treatment procedures AND specific criteria for when to call a professional exterminator.
        Step 3: Call `generate_pdf_report` saving to '{pdf_name}'. Summarize visual findings vs user hypothesis, safe insect dust steps, and explicit criteria for when professional extermination is required. Include '{image_path}'.
        """


🖥️ I arranged the root folder structure in accordance with the specific folder hierarchy required by the Flask web framework.
- /reports
- /static
- icon.png
- /templates
- index.html
- /uploads
- /venv
- app.py


Outcome: Employing the AI agent to analyze nest activity from videos and obtain a PDF report about potential pest species
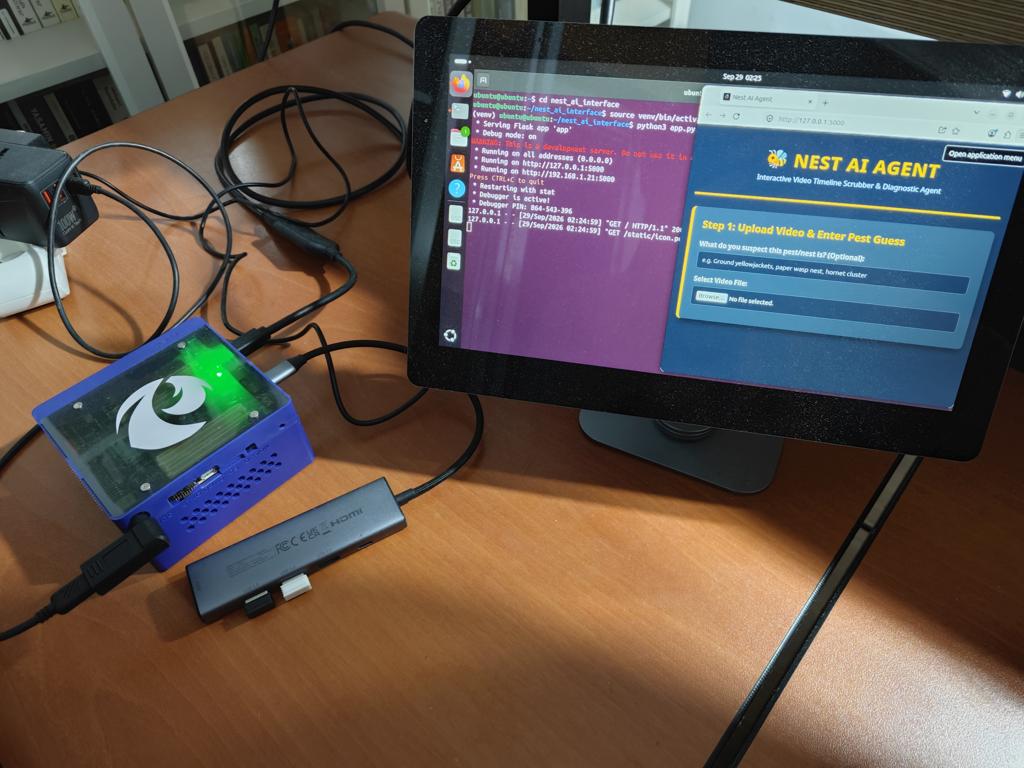
🐝🤖🔎 Once the Python backend of the smolagents AI agent and the Flask web interface (virtual environment) is initiated in the terminal, the user can access the web interface on port 5000.
cd nest_ai_interface

source venv/bin/activate

python3 app.py


🐝🤖🔎 The web interface allows the user to upload videos displaying outside pest nest activity, select a frame using the progress bar (slider), and pass the selected frame to the Python backend directly.
🐝🤖🔎 The web interface also lets the user enter assumptions about the pest nest, such as predicted species, nest size, colony population, etc., which enables the AI agent to review the user's deductions about the infestation and provide a more comprehensive report.


🐝🤖🔎 Once the Python backend receives the selected video frame, the smolagents AI agent utilizes the provided vision-language model as a tool via the Ollama API to analyze the pest activity in the frame.
🐝🤖🔎 Then, based on the VLM output, the AI agent conducts a web search to collect information about the VLM-suggested pest species and when to call experts according to the pest threat level. In addition to frame analysis, the AI agent also reviews the user assumptions about the pest nest to show whether they conform to the web-scraped pest information.
🐝🤖🔎 Finally, the AI agent compiles a PDF report file from the collected information and the given frame, and allows the user to download the report through the web interface.


🐝🤖🔎 In this regard, the user can generate reports on multiple frames with multiple hypotheses to form an educated opinion and treatment strategy, leading to contacting professionals sooner rather than later.


Project GitHub Repository
The project's GitHub repository provides:
- AI agent Python backend (smolagents)
- Flask web interface (w/ assets)
- Mechanical components (STL)
Schematics
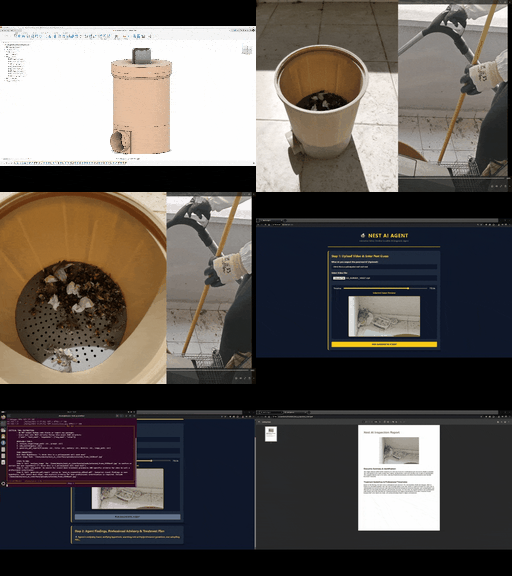
Project diagram generated by Google Gemini.

Code
Custom assets
Assets
See on other platforms
Related projects
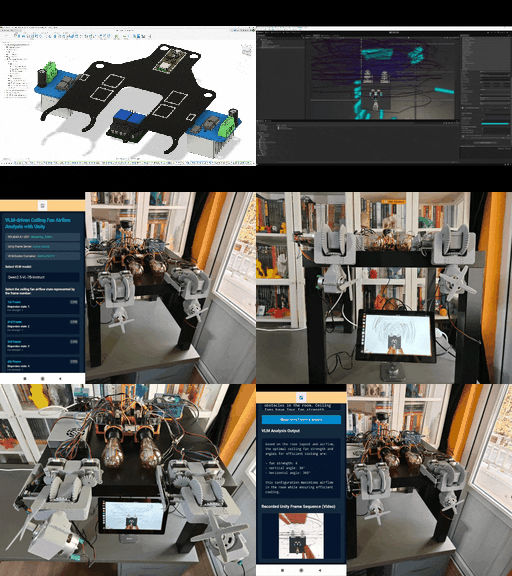
A study on VLM-driven ceiling fan airflow analysis w/ Unity
Utilizing VLMs to determine dual fan configurations for optimum cooling based on LiDAR-oriented real-time airflow simulations on Unity.
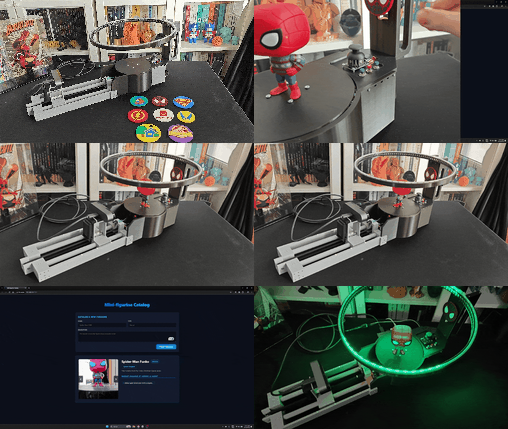
Mini-figurine Cataloger and Listing Tracker w/ Hermes Agent
Automatic platform and slider movements to capture 360 degree figurine images. Scheduled listing tracking and feature-rich web interface on UNO Q.
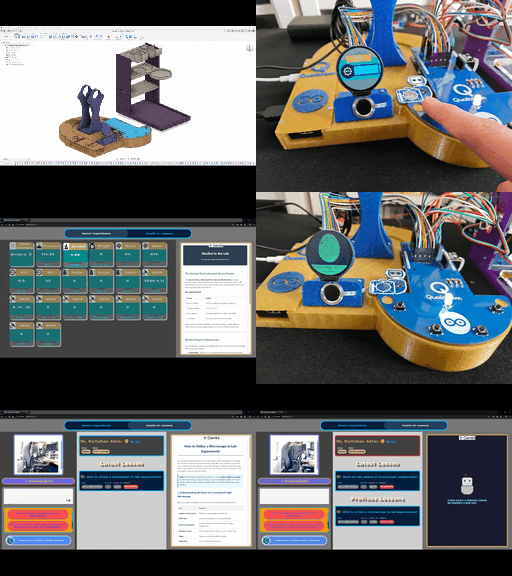
AI-driven Web-based Ancillary Lab Assistant | UNO Q & Gemini
Able to show sensor readings, identify users by fingerprint, detect lab equipment, generate lessons via Gemini, and talk via its dashboard.
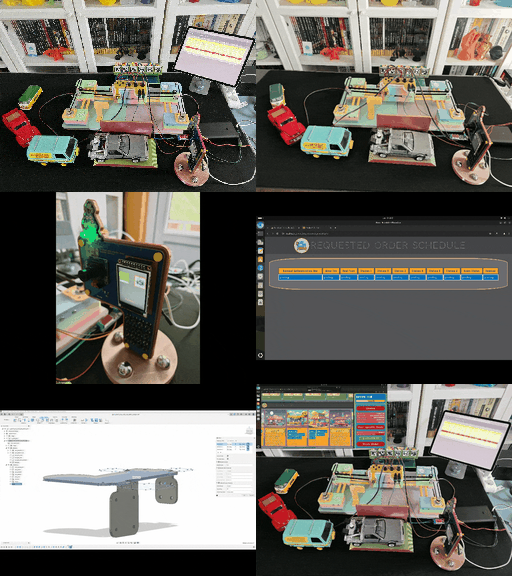
AI-driven LoRa & LLM-enabled Drive-through Kiosk & Food Delivery System
A research project on developing a full-fledged drive-through kiosk and food delivery system, utilizing LLMs to generate user-specific menus/deals.
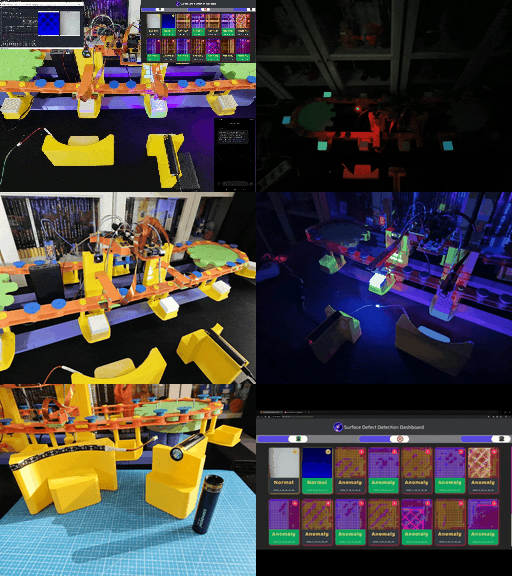
AI-driven Plastic Surface Defect Detection via UV-exposure
Experimenting with different UV wavelengths and camera types to develop a feature-rich industrial anomaly detection mechanism with edge AI.